
Thursday, December 17, 2020
Saturday, January 23, 2016

Thursday, March 20, 2014
Evolution

Creating a contrasting cocoon using wool blend felt

piecing two colors


tip: let an ombre or varigated thread do the work and create more interest than a single color would
overlaying more color with fine point markers

the "nest" for this fimo clay piece is made from scraps of a recycled wool sweater

more thread wrapping for the fimo elephant


Sunday, March 16, 2014
No more erasers :(

Carving up the last of the Pink Pearl erasers....

Run rabbits run!

Quick get to the poppy fields, talk to the small blue bird!

This mini poppy block is my new favorite, for now anyway......

Leap!

Print totem
More carving and printing please......


Saturday, March 15, 2014
Happy Mess........


275 degree oven for ten to twenty minutes to harden.


Thursday, October 10, 2013
paper, scissors, glue & friends!
The Wednesday tradition of making art with friends continues! We missed you Karen!
We looted my craft studio and Amanda brought lots of fun finds from the B&D Bargain Bin where second hand art and craft supplies abound with lots of other well used treasures perfect for creative re-purposing! In Amanda's latest contribution was a box of multimedia papers including some produced by a local artist. She also brought charming old photos found at an antique shop (scanned and re-printed for endless re-use). We all enjoyed snacks (thank you Nancy and Amanda) and got right to the fun!
I printed out a wonderful owl treat box template found on Pinterest and Amanda instantly had an idea for a different use for the template!

The finished works below! Apologies in advance for my awful photos. I will have to have the girls send me better pics of their delightful creations. This is what comes of neglecting the photo shoot portion of the festivities until after dinner and a glass of wine!


We looted my craft studio and Amanda brought lots of fun finds from the B&D Bargain Bin where second hand art and craft supplies abound with lots of other well used treasures perfect for creative re-purposing! In Amanda's latest contribution was a box of multimedia papers including some produced by a local artist. She also brought charming old photos found at an antique shop (scanned and re-printed for endless re-use). We all enjoyed snacks (thank you Nancy and Amanda) and got right to the fun!
I printed out a wonderful owl treat box template found on Pinterest and Amanda instantly had an idea for a different use for the template!

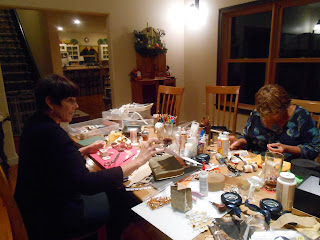
Amanda and Nancy in their stamping, cutting, gluing, multimedia glory!


All set out with past years' inspirational Halloween splendor!

Amanda's spooky multimedia boxes and mini tin!

Nancy's glittered candy corn tin and inspired trick-or-treat vignette box!

My sister's vignette box from past years that inspired it!

My finished treat box "Antoine" the owl, aptly named by Amanda after she punched out some paper shapes from left over scraps and one little crown conveniently had "Antoine" neatly centered on it!
Just another reminder that we can be constantly inspired by the creativity around us! So get out there and wander the web, check out your local arts and crafts scene, ask your friends and family what they've been creating, and get your art on!
Subscribe to:
Posts (Atom)