Thursday, December 29, 2011

I thought of you......

Like many clever resourceful people, my Grandmother Waldron had a drawer where she kept materials from "interrupted projects". Some were her own and some were tag sale finds. Unfinished dresden plates and sun bonnet sue quilt pieces sat next to partially completed embroidery.kits. She often pulled these out during visits, handing them over one by one to add to my fabric stash saying "I thought of you and what you might do with this". The next part of the conversation was magic to me. When I would begin to describe the many possibilities spinning around in my head, she would say "oh don't worry, it's OK to cut them up!". 


So...... a portion of Mary Waldron's never finished ombre embroidered  rose linen table cloth has become a delightful set of hangers for the guest room.

If you would like to make this project yourself, just start with a few wire hangers, trace their shape on fabric, and cut out two pieces for each leaving a 5/8th seam allowance on the curved sides and two inches at the straight bottom. Cut a piece of 3/4 inch wide ribbon twice the length of the hanger hook plus two inches. Fold in half right sides together and stitch down each side, stopping an inch from the bottom. Turn right side out and slip over the hook. I like double faced satin ribbon for ease of turning. Place your  fabric pieces right sides together, stitch along the curved sides leaving a one inch opening at top and an opening the full length at bottom. Turn right side out, press, and slip the finished piece over the ribbon covered hook. I stitched up the bottom by hand, folding the fabric twice and using more ombre embroidery thread to to make a seam that ties in with the original embroidery work. You could also use a blind stitch or even leave raw edges if the fabric texture lends itself to that effect. Finish by stitching through both the ribbon and fabric cover where the hook meets the main body of the hanger and catch another short piece of ribbon to tie into a small bow. Voila! Elegant, vintage, and possibly a story or two to tell with this little recycle project!

I'd love to see what you do with this idea! Comment and link to your finished project if you wish to share. 

Thursday, December 22, 2011

the making of silly things......

 Alphabet and Czech glass beads strung on elastic with "squinkies" (Don't ask, I found them in the clearance section in Walmart). Selecting the words to go with the figures was fun,
 I ended up with quite a collection of stretchy bracelets to send off in holiday packages to unsuspecting loved ones.
These guys were apparently concerned about the prospect of being skewered as well, but were ultimately spared due to their being a bit too big to make into bracelets! 

Sunday, December 11, 2011

Simple words for the season.........


A coat of chalkboard paint, embossed metal label brackets, and few choice words! These little boxes look right at home with last year's special project, a "snow people" homage to my grandparents Mary and Marshall! May peace, joy, and tasty cookies be part of your holiday spirit!


Friday, December 2, 2011

snips n snails n puppydog tails.........


I re-purposed some of Jackie's favorite jeans from "yesteryear" and added an applique doggie inspired by a cute children's fabric print to make grandson Reed a travel bag. Lots of other recycled materials including a felted sweater, an outdated leather jacket, and two shirting fabrics went into this "green" project.


Wednesday, October 12, 2011

Look close... everything old is new again

Major material up-cycle on this lined18 by 18 inch bag with a 3 inch gusseted bottom, and zipper closure. I am re-upholstering a sofa and saved all the old tapestry fabric. This is the "wrong side" of the material and it almost makes me wish I had just removed and reversed the original fabric instead of replacing it!

 I really enjoyed the piecework, selecting vintage embellishments, and adding the hand stitched details.  

 I love the crazy lining and of course I had to add a label to finish it all off! This one is headed off to my Etsy shop!

Monday, September 26, 2011

Beatrice's Good Fortune


A little soft sculpture doll making with a story to tell.......................................

Thursday, September 22, 2011

studio garden harvest


This has not been a gardening summer at our house because we are still trying to transform the mud lawn into a green lawn, much less any  planting of fruits, vegetables, and flowers.  I did however manage to harvest some recycled fabric scraps to make a  pumpkin,  and added a homemade tag that reads "lucky find". 

Halloween Snippets

 An old favorite and some new friends tucked into a shadow box make a  fun Halloween display for Jackie and Reed's new apartment!
 A little crepe paper mixed with vintage graphics and topped off with a pipe cleaner handle!
 A thrift store mirror embellished with more crepe paper and some silly spooky stickers!
 A Martha Stewart owl invite template gone 3D on a crepe paper covered base!
Jackie's skelly marionette hangs out with his new friends! Reed likes to be chased around the house with this little laughing puppet!

Thursday, September 1, 2011

secret garden

When she first saw it, my baby sister Nancy thought this was a picture  of me! Silly girl, it is her standing by the flower beds of our childhood home. Of course it can't possibly be me, I was a very grown-up five year old when we moved there!

I am sending her this mixed media piece to remind her that as the oldest sister I am always (or almost always) right!

Tuesday, August 30, 2011

things to put things in to make things......

It's true, they don't sell proper containers to hold tubes of vintage printing ink or an over abundance of wired chenille. So I make my own! Start with empty cardboard or tin snack containers, spray black with a coat of acrylic medium add paper of your choice and seal with another coat of medium. Voila!


Thursday, August 25, 2011

second chance dress


The bodice is cut from a piece of rayon I bought in a vintage shop some twenty years ago and the skirt is from a much loved and well worn silk skirt that has seen better days


My favorite part, a little dressmaker detail of narrow ribbon at the neckline. Can't wait to wear it!


Wednesday, August 24, 2011

sewing bliss in the new studio


I never met a grommet I didn't like.....


It's all in the details, the fun that is........


OK, I don't really need a pattern in order to make a peasant blouse, but who can resist Butterick patterns for a dollar....


Finito and ready to wear!


My favorite piece in the sewing section of my new creative wonderland, the boys old model car case filled with thread and presser feet!


I am glad my husband suggested painting the back wall red!

night sky


A super cool full moon shining out from behind the clouds over the roof line of the barn. The moon was so bright it illuminated the entire cloud bank. I shot this and a series of other photos at 11:45 PM on August 13th. It was eerily beautiful that night!

And now, back to the studio..........

Monday, August 1, 2011

up North ADK

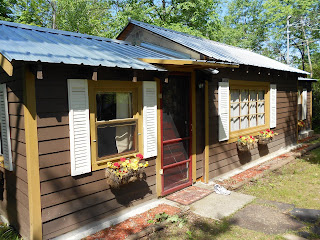
A trip up north with my daughter and grandson to visit family.... our lovely accommodations at Dad's guest cottage,
the little red cottage across the foot bridge........ 

and our bunk mates , my sister Meri and niece Julija.

The babbling brook is beautiful to watch and soothing to listen to.
Dad with great grandson Reed!

Jackie and Reed take in the view on the Heron Marsh trail  

 Later Reed and I climb the big rock.

Ice cream for the tired hikers!

Good bye brook, I'll be back!